Tagged PRs
You can use tags to create your own categories to track important pull requests. You might create a tag to easily categorize pull requests:
- Going into a specific release
- Related to a new feature, even across repositories
- For a specific client
- Conforming to a certain naming protocol that has significance in your workplace, like “Feature” or “Bug”
You can apply tags to pull requests manually, or create filters to automatically tag incoming pull requests that meet criteria you define.
Once you have tagged pull requests, you can view and filter your tagged PRs in the Tagged PRs dashboard.
Tagged PRs Dashboard
In the Tagged PRs dashboard, each pull request summary displays a list of tags that have been applied to it.
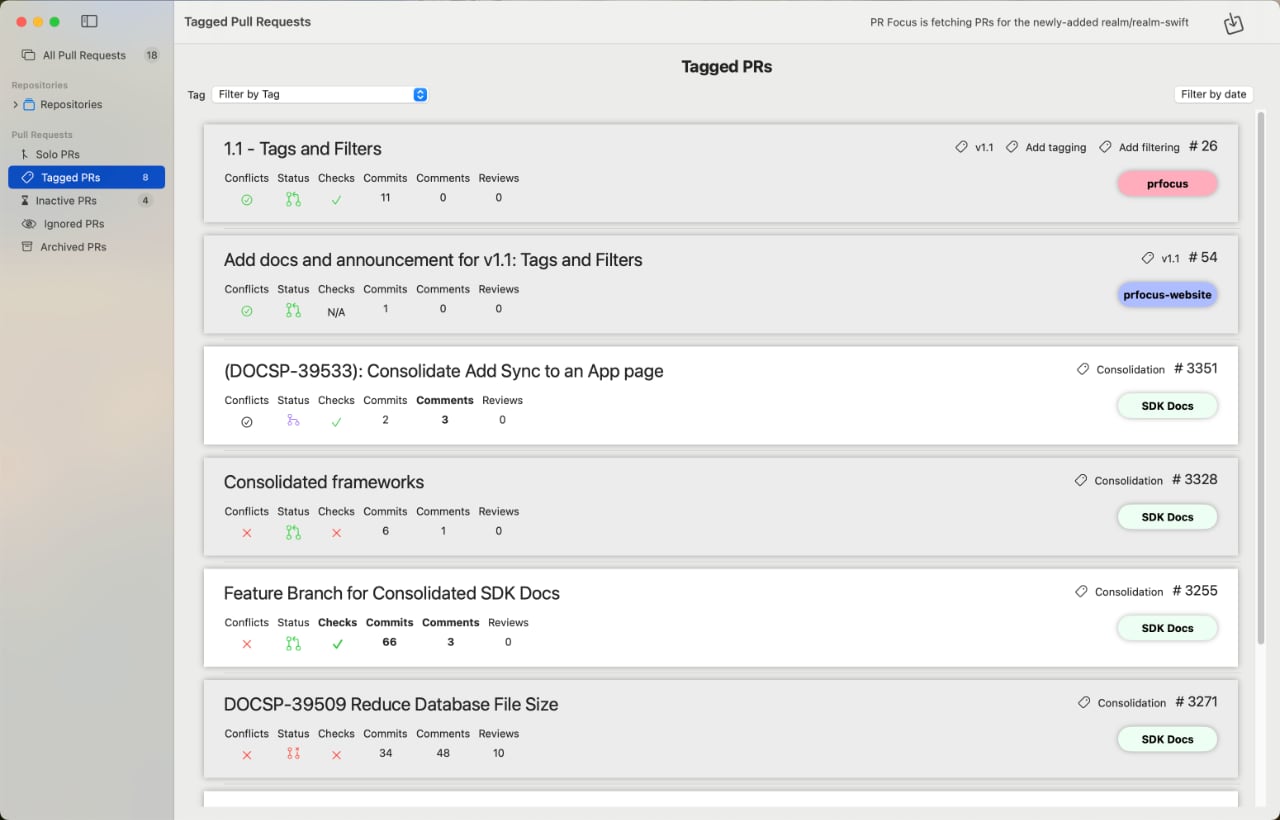
You can filter PRs by tag, and optionally within a date range by one of the available date fields.
Filter PRs by Tag
You can filter PRs by tag using the Tag filter in the upper left-hand corner of the Tagged PRs dashboard. Select a specific tag to view only the PRs related to that tag. Or select the placeholder “Filter by Tag” to clear the tag filter.
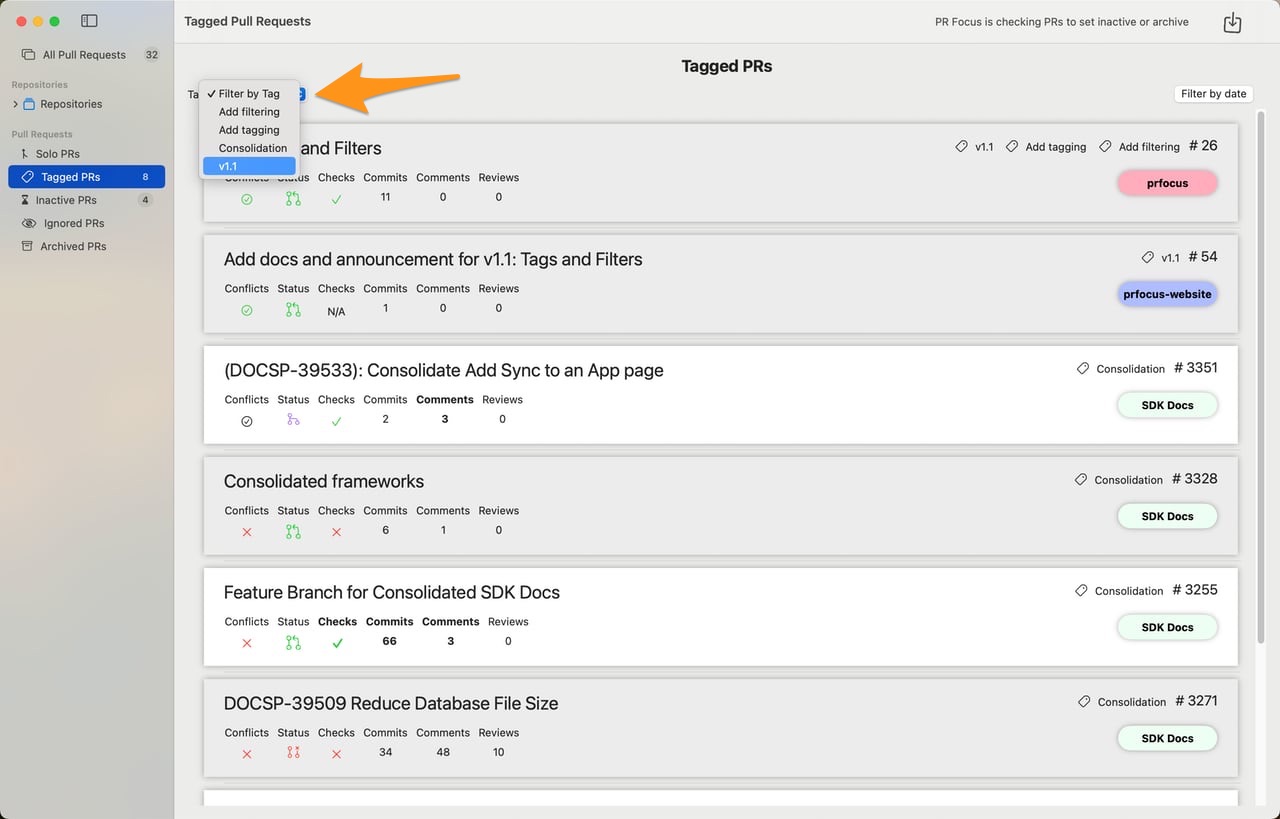
Filter PRs within a date range
You can filter PRs within a date range in the Tagged PRs dashboard. Press the Filter by date button in the upper-right corner of the Tagged PRs dashboard. This opens the date picker.
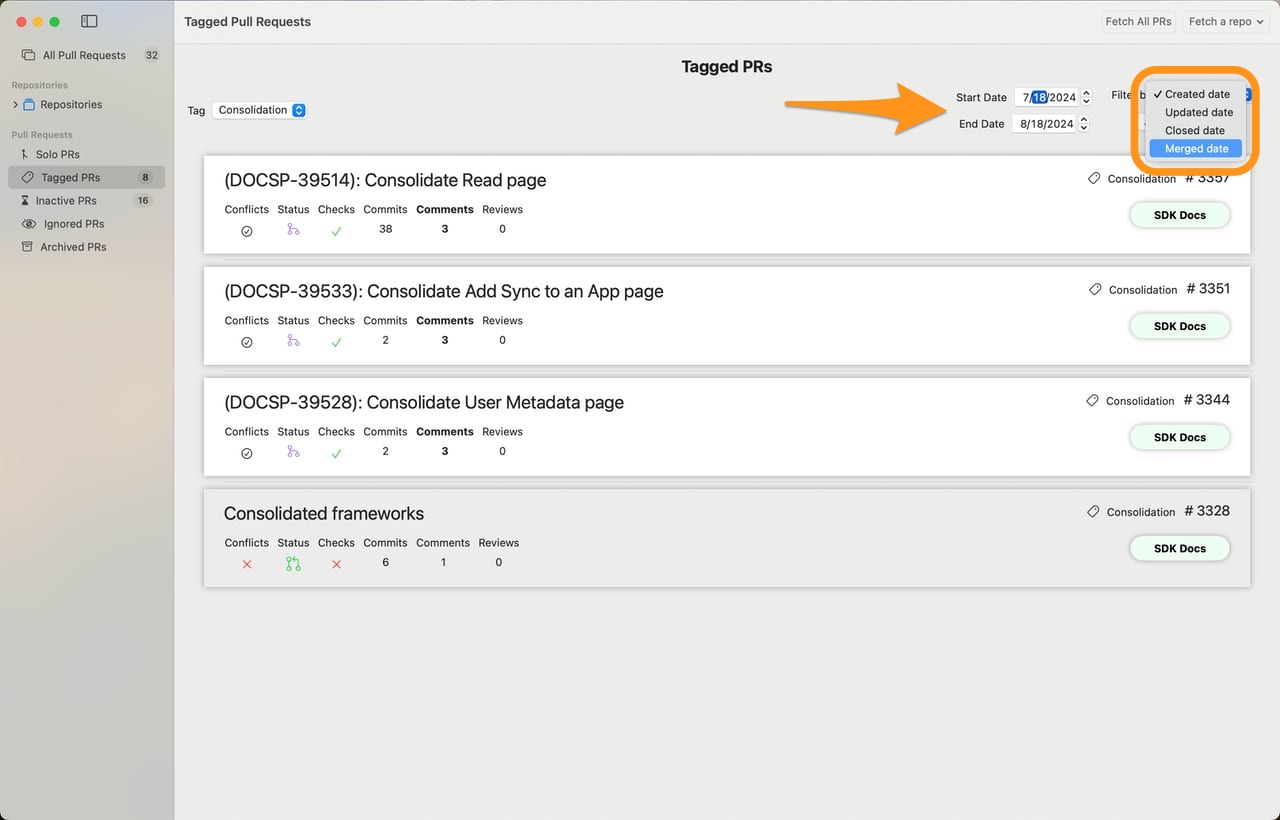
Select a start date, and an optional end date. You can specify the type of pull request activity to use in the date filter:
- Created at date
- Updated at date
- Closed at date
- Merged at date
If a pull request has not yet been closed or merged, the closed and merged dates are nil, so the PR will not show up in either of those filters.
Press the Apply button to view only pull requests where the specified pull request activity falls within the date range. When you’re done, press the Clear button to remove the date filter.
Apply Tags to PRs
You can apply tags to a PR from two places:
-
The right-click context menu available when you’re viewing pull request summaries in a list view. Right-click a PR summary, and select Apply Tags.
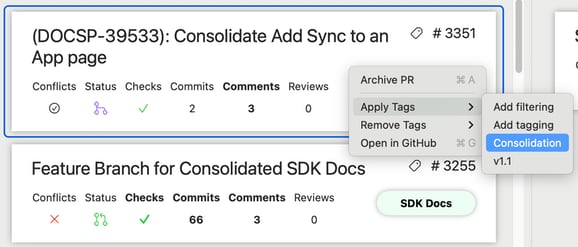
-
The pull request detail view. Select a tag from the Apply Tags menu in the upper right-hand corner of the detail view, above the repository label.

Any tags that you’ve created appear in this menu, sorted by most recently updated.
When you apply a tag, the pull request summary gets a “Tag” icon.
![]()
The tag appears in the pull request detail view. And the tag is displayed in the pull request summary when you’re viewing the Tagged PRs dashboard.
Remove Tags from PRs
You can remove tags from a PR from two places:
-
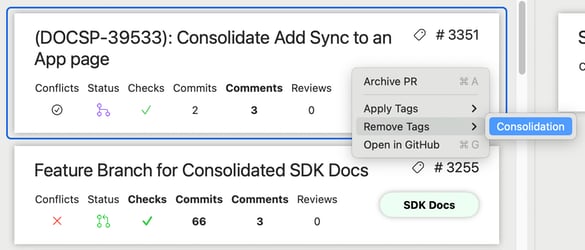
The right-click context menu available when you’re viewing pull request summaries in a list view. Right-click a PR summary, and select Remove Tags. Choose the tag you want to remove.
-
The pull request detail view. Right click on a tag in this view, and select the Remove Tag option.

The tag is removed from the PR. If no other tags apply, the PR no longer appears in the Tagged PRs dashboard.
Create and Manage Tags
You can create and manage tags from the Tags menu.
Create a Tag
To create a new tag:
-
Go to the Tags menu.
-
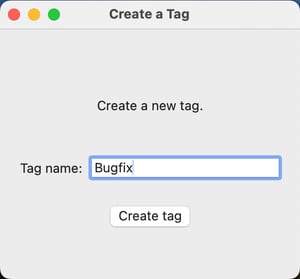
Select Create a Tag

-
Provide a name for the tag.
-
Press the Create Tag button.
Rename or Delete a Tag
To rename or delete a tag:
-
Go to the Tags menu.
-
Select Manage Tags.

-
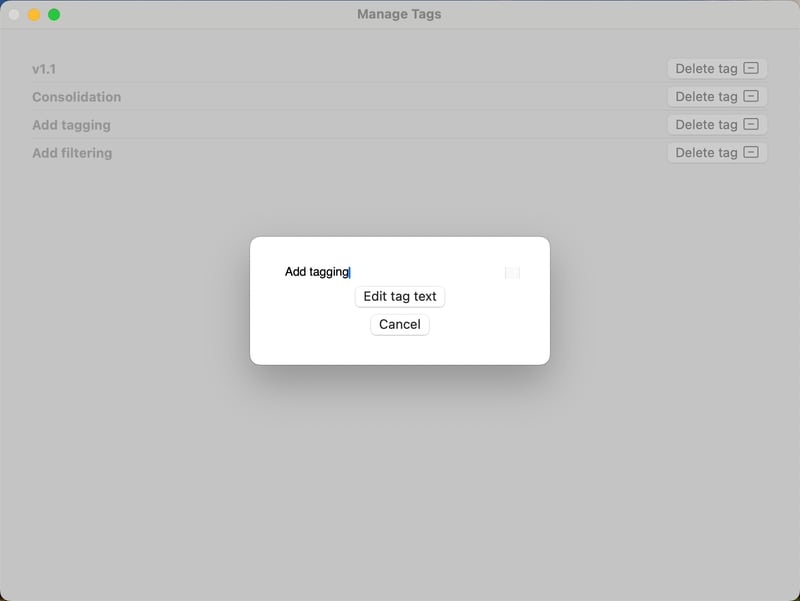
Click a tag name to bring up a sheet where you can edit the tag name. This automatically renames the tag in the menus, and on all PRs that have had the tag applied.
-
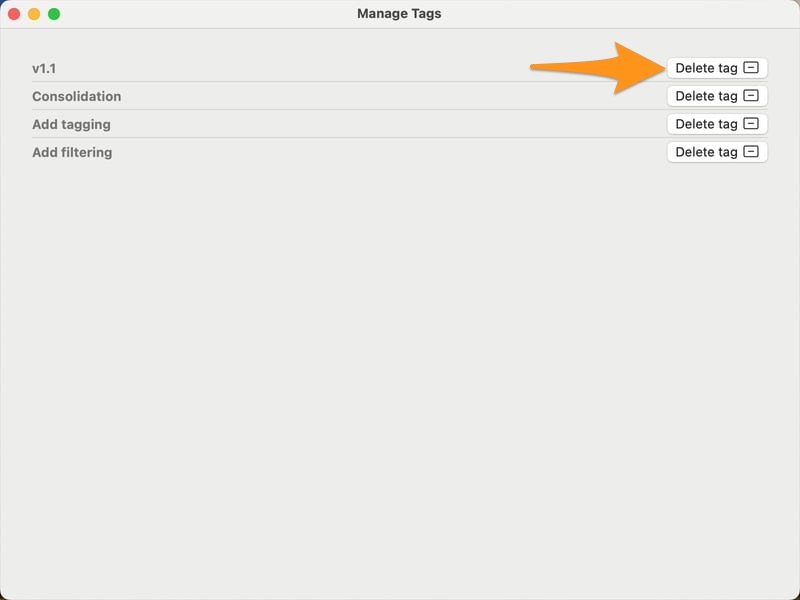
Press the Delete tag button to remove a tag from PR Focus. This automatically untags all PRs that have the tag applied.
Feedback
Was this page helpful?
Glad to hear it! Please tell us how we can improve.
Sorry to hear that. Please tell us how we can improve.